RG40XX V: Full ROCKNIX Installation and Usage Notes
I previously wrote about installing different systems on the RG35XX Plus in RG35XX Plus Open-Source Handheld OS Installation Attempts and Usage Guide. At that time, ROCKNIX didn’t support the RG35XX Plus. I’ve now bought a new device, the RG40XX V, so let’s install ROCKNIX and have some fun.
Installing ROCKNIX
-
Download the system image: https://github.com/ROCKNIX/distribution/releases/tag/20250517.
Since this is an RG40XX V device, downloadROCKNIX-H700.aarch64-20250517.img.gz(images differ by device) -
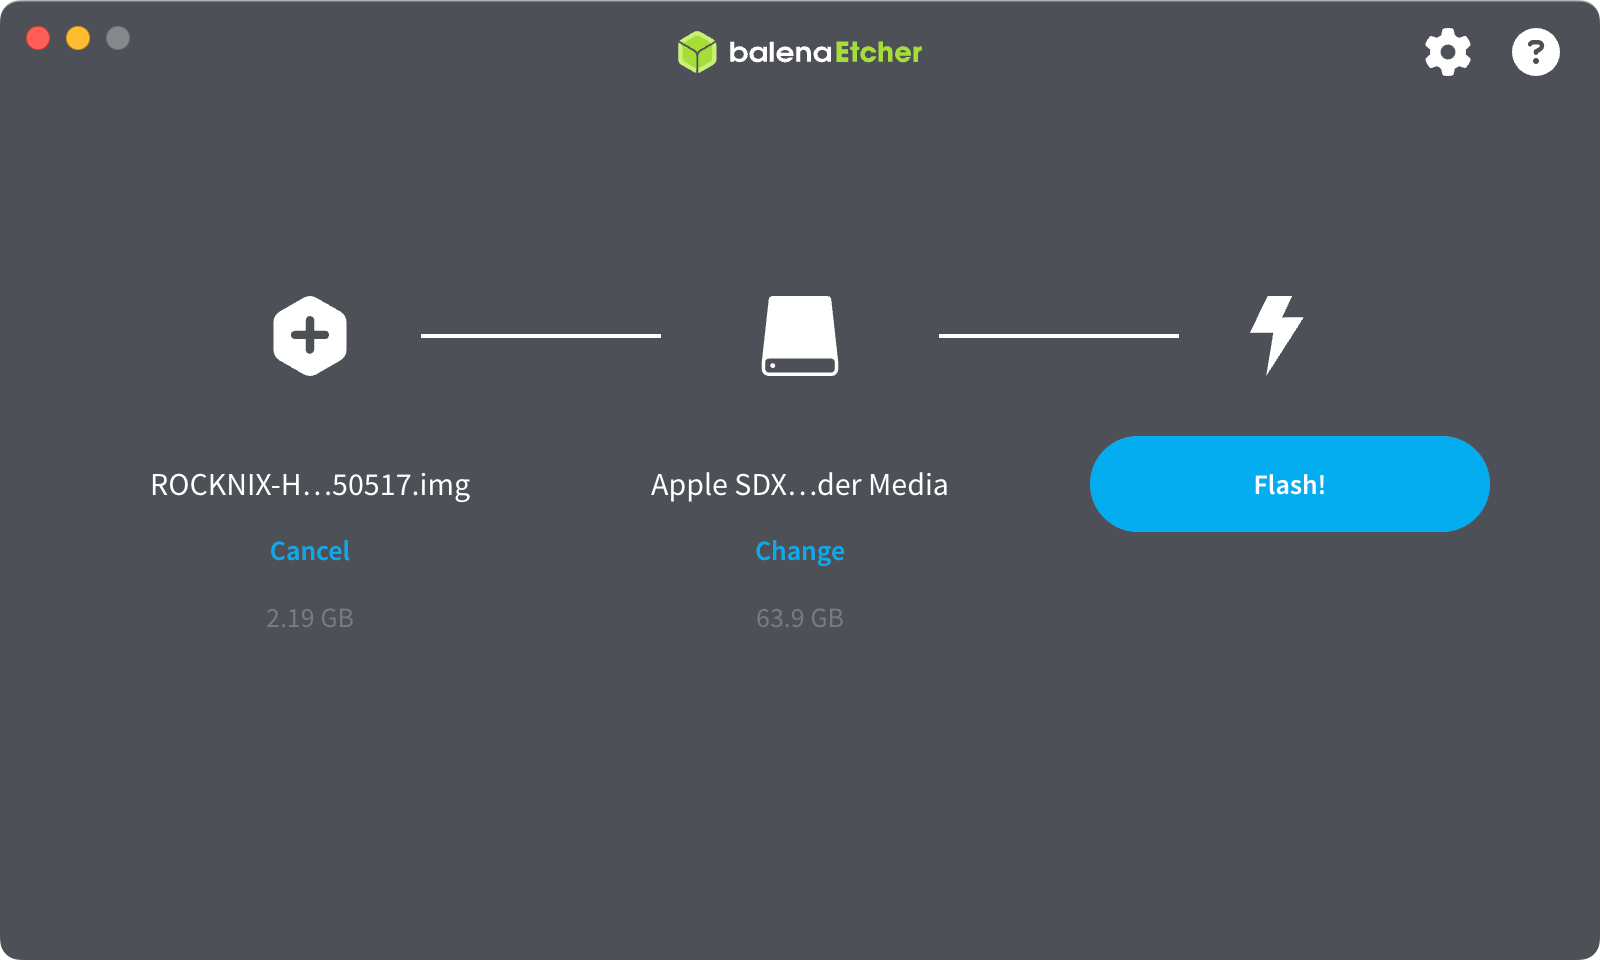
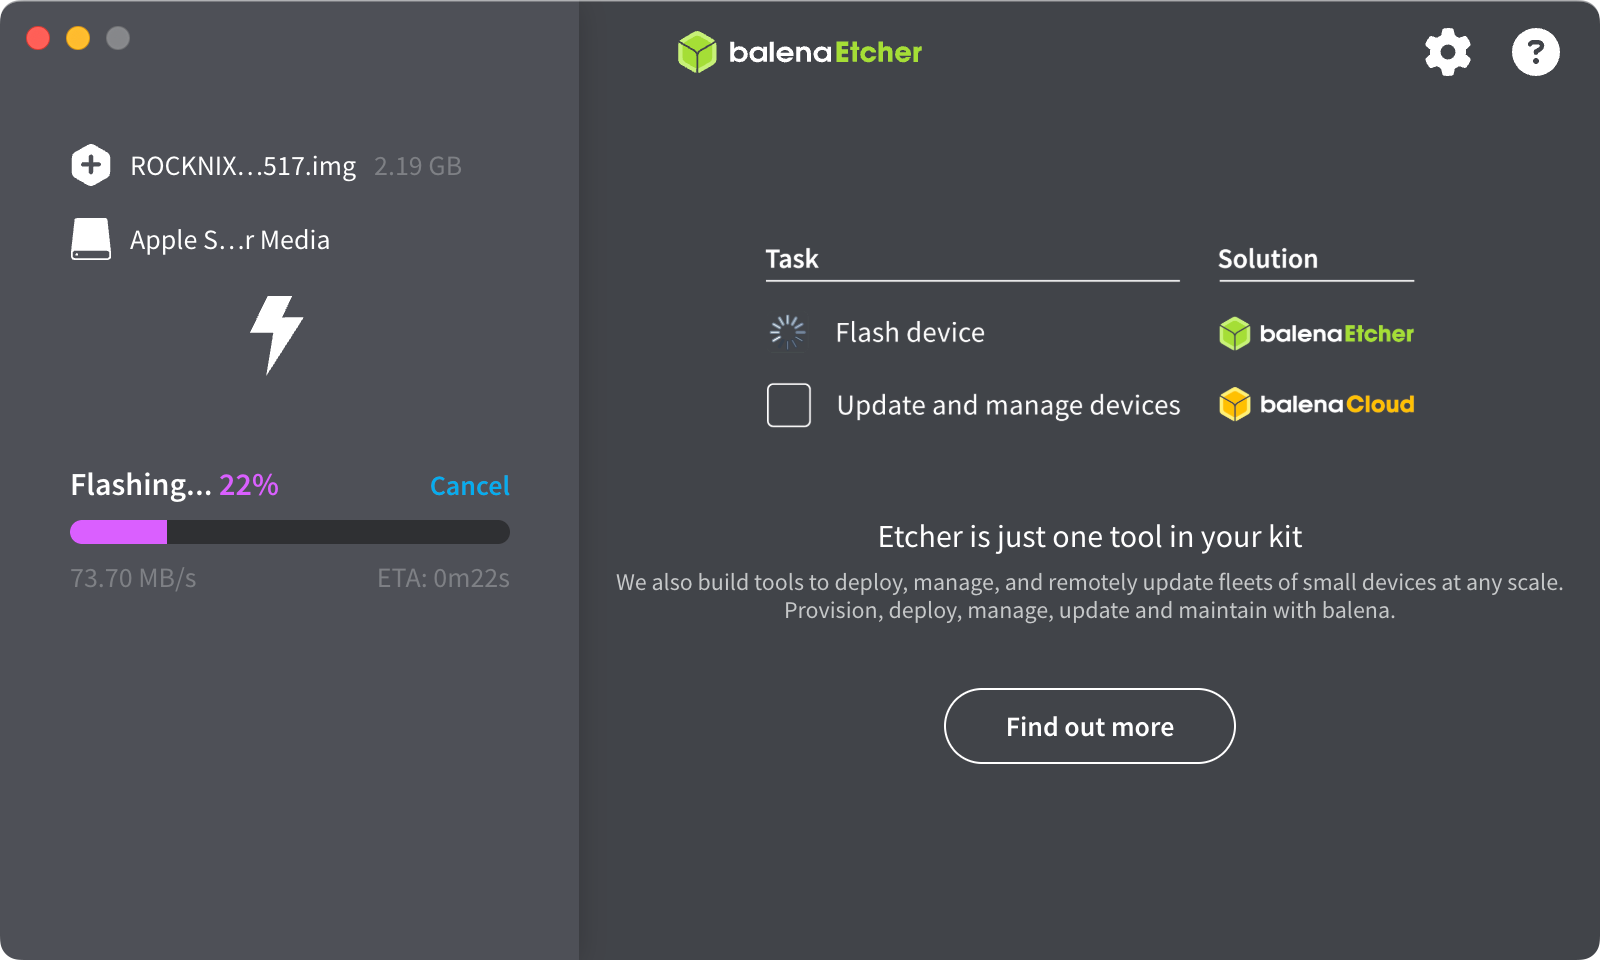
Flash the image to an SD card. I’ll use Etcher (other tools like Rufus or the
ddcommand work too)
-
If your device is from the H700 series (my RG40XX V is), there is one extra step. Because hardware differs between models in this series, you must manually select the correct device tree file:
- In the SD card’s root directory, open the
device_treesfolder and find the device tree file for your device. For the RG40XX V, usesun50i-h700-anbernic-rg40xx-v.dtb - Copy this file to the SD card’s root directory and rename it to
dtb.img(all lowercase)
- In the SD card’s root directory, open the
-
Eject the SD card, insert it into the powered-off device, then power it on
-
The installation is quick — a bit over two minutes in my case
Usage Notes
These notes are based on the nightly-20250815 testing build rather than the 20250517 stable release. The stable image has a few issues on the RG40XX V (for example, it doesn’t support HDMI output), while the nightly does. I need HDMI for some screenshots, so the nightly was more convenient.
The official docs are already very thorough — for example, how to add games, networking, cloud sync, RG40XX V specifics (like hotkeys), etc. This post just jots down a few items I might forget, things that aren’t super obvious, or special cases.
SSH & Samba
SSH is enabled by default. You can log in with ssh root@<device_ip_address> and the password is rocknix.
Samba is also enabled by default. Connect via smb://<device_ip_address>; no username or password is required — anonymous login works.
HDMI
The official docs note that some devices behave better if you plug in the display before powering on, rather than after.
There is no HDMI section in the system settings UI, but if you want to configure things like output resolution, the official docs provide a method:
- Create an autostart script:
mkdir /storage/.config/autostart vim /storage/.config/autostart/090-sway-hdmi-resolution - File contents:
#!/bin/bash echo "output HDMI-A-1 resolution 1280x720" >> /storage/.config/sway/config - Make it executable:
chmod +x /storage/.config/autostart/090-sway-hdmi-resolution
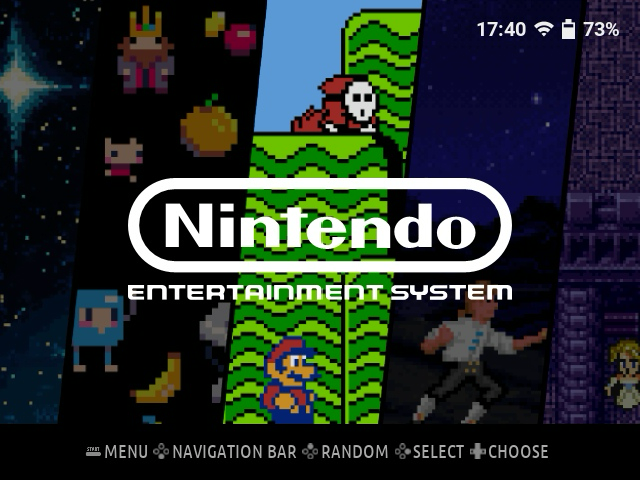
EmulationStation
The ROCKNIX front-end UI is based on the Batocera EmulationStation fork EmulationStation NEXT, customized and maintained by ROCKNIX.
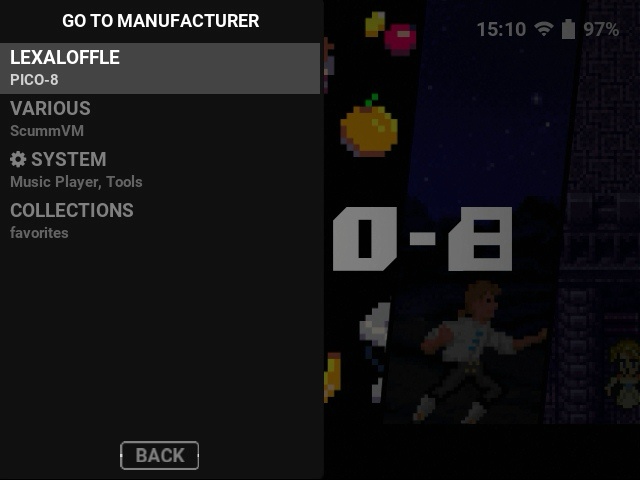
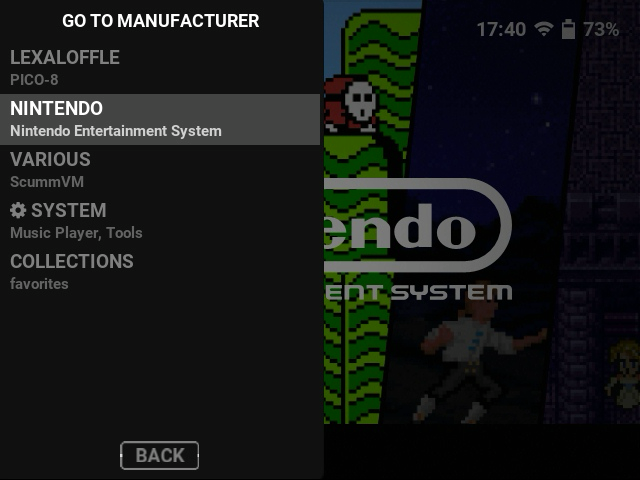
Why Isn’t the Platform I Want Visible on the Home Screen?
Right after first boot, only PICO-8 and ScummVM are visible.
EmulationStation scans the paths defined in /storage/.emulationstation/es_systems.cfg. If a platform’s scan results are empty, that system won’t appear on the home list. For example, here’s a snippet from the config for NES:
<system>
    <name>nes</name>
    <fullname>Nintendo Entertainment System</fullname>
    <manufacturer>Nintendo</manufacturer>
    <release>1985</release>
    <hardware>console</hardware>
    <path>/storage/roms/nes</path>
    <extension>.nes .unif .unf .zip .7z</extension>
    <command>/usr/bin/runemu.sh %ROM% -P%SYSTEM% --core=%CORE% --emulator=%EMULATOR% --controllers="%CONTROLLERSCONFIG%"</command>
    <platform>nes</platform>
    <theme>nes</theme>
    <emulators>
        <emulator name="retroarch">
            <cores>
                <core default="true">nestopia</core>
                <core>fceumm</core>
                <core>quicknes</core>
                <core>mesen</core>
            </cores>
        </emulator>
        <emulator name="mednafen">
            <cores>
                <core>nes</core>
            </cores>
        </emulator>
    </emulators>
</system>
If you place valid ROMs under /storage/roms/nes, the NES platform will appear on the home screen.
Manually Adding Game Metadata
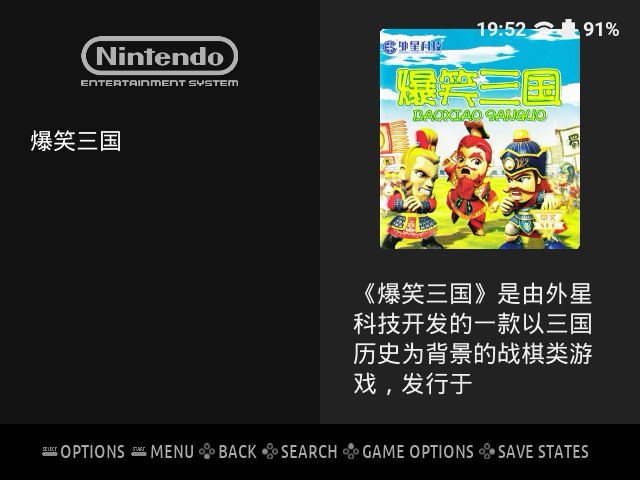
ROCKNIX can pull game metadata from ScreenScraper — things like cover art and release dates. If scraping fails, you can add metadata manually.
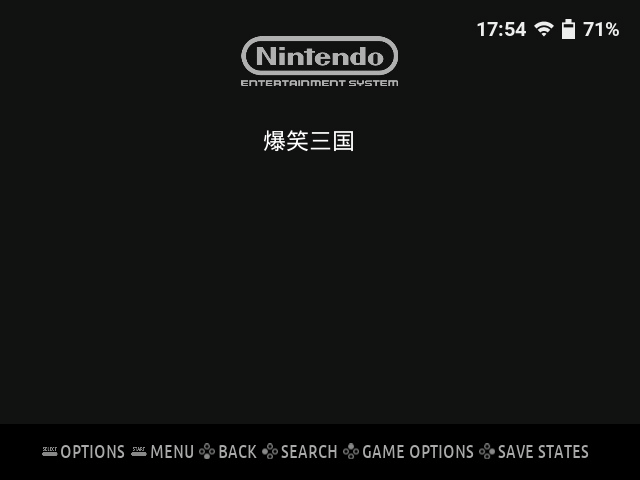
As an example, let’s add a NES game called “爆笑三国” (this is a Chinese game title). Put the ROM 爆笑三国.zip under /storage/roms/nes, then add two asset files boxfront.jpg and logo.png. Your folder structure should look like this:
/storage/roms/nes
|-- assets
|   `-- 爆笑三国
|       |-- boxfront.jpg
|       `-- logo.png
|-- gamelist.xml
`-- 爆笑三国.zip
gamelist.xml is the metadata file used by EmulationStation. Here’s an example (you can add more fields like rating, players, etc.):
<?xml version="1.0"?>
<gameList>
    <game>
        <path>./爆笑三国.zip</path>
        <name>爆笑三国</name>
        <developer>外星科技</developer>
        <releasedate>1994</releasedate>
        <desc>《爆笑三国》是由外星科技开发的一款以三国历史为背景的战棋类游戏,发行于 FC(红白机)平台。游戏采用幽默诙谐的风格,重新演绎三国历史,增添了许多搞笑元素。玩家将扮演刘备、关羽、张飞等知名武将,体验丰富多样的职业系统和转职机制。游戏中包含多种职业,如步兵、骑兵、弓兵和文官等,每个职业都有独特的技能和转职路线,增加了游戏的策略深度和可玩性。此外,游戏还原了诸多经典的三国战役,并通过搞笑的剧情对白,为玩家带来轻松愉快的游戏体验。凭借其独特的风格和丰富的玩法,《爆笑三国》在众多 FC 游戏中脱颖而出,成为玩家们津津乐道的经典之作。</desc>
        <image>./assets/爆笑三国/boxfront.jpg</image>
        <marquee>./assets/爆笑三国/logo.png</marquee>
    </game>
</gameList>
Below: left is before adding metadata; right is after.
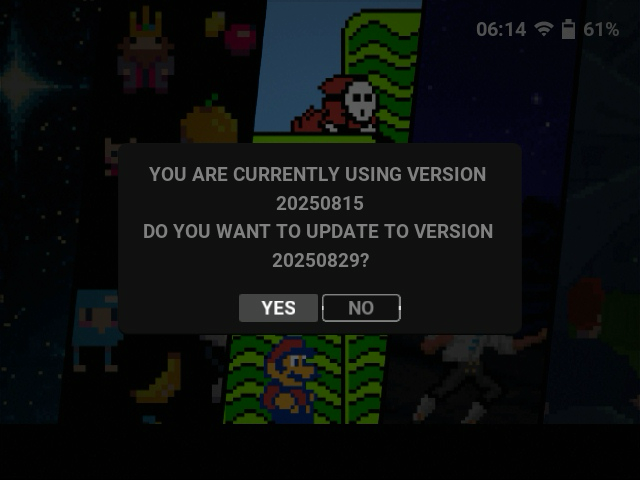
System Online Update Support
ROCKNIX is an immutable system, which makes implementing system updates easier and more reliable at the technical level.
Just download the update from the system settings and reboot — that’s it. If your device doesn’t have internet access, you can also update manually. See the official docs for details.

Next: Future chapters, waiting for you to traverse and meet again